ธีม
Install and run
One-time setup, about 15 minutes. Do the steps in order — each one assumes the one before it.
Two things before the first command
- Install everything listed under Software to install — Node.js 22 or newer, Git, a GitHub account and an editor. Nothing on this page works without them, and Node 20 fails in a way that does not say "wrong Node". Check with
node -vfirst. - Open a terminal. Every grey box below is typed there — not in your editor, not in a browser. How to open one on macOS, Windows or inside VS Code.
1. Sign in to GitHub
bash
gh auth loginIt asks four questions, one at a time. The answers, in order:
? Where do you use GitHub?                                        GitHub.com
? What is your preferred protocol for Git operations on this host?  HTTPS
? Authenticate Git with your GitHub credentials?                    Y
? How would you like to authenticate GitHub CLI?      Login with a web browser
The third one you type — Y, then Enter. The others are lists you move through with the ↑ ↓ arrow keys and choose with Enter. The last one looks like this, and the > marks where you are:
? How would you like to authenticate GitHub CLI?  [Use arrows to move, type to filter]
> Login with a web browser
  Paste an authentication token
Then it hands you a code and waits:
! First copy your one-time code: 1A2B-3C4D
Press Enter to open https://github.com/login/device in your browser...
Copy that code, press Enter, and paste it into the GitHub page that opens. Approve, come back to the terminal, and it finishes by itself:
✓ Authentication complete.
✓ Logged in as your-username
The code is yours and it is different every time
Never reuse one from a guide, a screenshot or an older terminal window. Read it off the line above each time — that is why it is printed rather than sent to you.
Follow the terminal, not this page
If your gh is a different version it may ask the questions in a different order or add one. The terminal is always right; this page is only here so the sequence is not a surprise.
No gh? Skip this step. Step 2 has a plain-git alternative.
2. Get the project onto your machine
First move to wherever you keep projects — your Documents folder is fine:
bash
cd ~/DocumentsThen copy the project down:
bash
gh repo clone samomdkku/samomdkkuwebYou should see a progress line ending in something like Receiving objects: 100%, and then your prompt back.
Nobody has to let you in — this repository is public
samomdkku/samomdkkuweb is a public repository, so this clone works for anybody with a GitHub account. If it fails with Repository not found, it is almost always one of two boring things: a typo in the name, or gh is not signed in (step 1). It is not a permission problem — there is no permission to have.
Permission starts mattering one step later, when you send a change back. Pushing a branch into this repository needs an invitation. Without one you push to your own copy of it instead, which you can make at any time:
bash
gh repo fork samomdkku/samomdkkuweb --cloneBoth roads end in a pull request that gets reviewed and merged. The one real difference is that a fork gets no automatic preview site, because GitHub will not hand a fork the project's secrets — the two roads side by side.
No gh?
bash
git clone https://github.com/samomdkku/samomdkkuweb.gitWhat just happened
A folder named samomdkkuweb now exists inside the folder you were in. It contains the whole project and its entire history — every change anyone has ever made. That is what git is: not just the current files, but how they got that way.
3. Go into the folder and install the dependencies
bash
cd samomdkkuweb
npm ci
npm ci downloads the exact library versions recorded in package-lock.json. It usually finishes in well under a minute — a couple of minutes on a slow connection — and prints a lot on the way.
You should see something close to this. Yellow warnings, a vulnerability count, no ERR!:
npm warn deprecated backbone-undo@0.2.6: Package no longer supported.
npm warn deprecated node-domexception@1.0.0: Use your platform's native DOMException instead
npm warn deprecated glob@10.5.0: Old versions of glob are not supported...

added 507 packages, and audited 508 packages in 12s

155 packages are looking for funding
  run `npm fund` for details

6 vulnerabilities (4 moderate, 2 high)

To address issues that do not require attention, run:
  npm audit fix
Your numbers will not match exactly — they move whenever a dependency is updated, and a different npm version words things differently. That is fine. The two paragraphs below explain both kinds of scary output, because between them they are the most alarming-looking thing in the whole setup.
npm warn deprecated is not about our code, and you cannot fix it
Each line names a package that one of our packages depends on — not something this project chose, and not something anyone here can change. The only person who can is the author of the package in the middle.
They were all checked on 2026-09-06, and each is a dead end on purpose:
| The warning | Comes from | Why it stays |
|---|---|---|
backbone-undo | grapesjs, the visual page editor | We are already on grapesjs's newest release. There is nowhere to upgrade to |
node-domexception, glob | @google/clasp, the Apps Script command-line tool | A build-time tool only a few people ever run. It never reaches a browser |
⛔ Do not "fix" them by editing package.json or package-lock.json. A deprecation warning means the author stopped maintaining it, not it is broken and not it is dangerous. Ignoring it is the correct response here.
The vulnerability count is real, but it is not about the live site
Almost every JavaScript project prints one. Every entry behind this number is a build-time or maintainer-only tool — the development server, the docs site builder, the Apps Script uploader. None of them is shipped to a browser, so none of them is code a student runs.
⛔ Do not run npm audit fix. It rewrites package-lock.json — the file whose entire job is pinning exact versions so everyone builds the same thing — and you would be opening a change nobody asked for, touching thousands of lines, that a reviewer cannot sensibly read.
The only word that means failure here is ERR!. If you do not see ERR!, the install worked, whatever the numbers say.
Use npm ci, not npm install — ci installs the exact versions CI uses, so "works on my machine" means something.
From here on, every command on these pages is run from inside this folder. If a command says "not found" or "no such file", check where you are before anything else:
bash
pwdYou should see a path whose last part is samomdkkuweb:
/Users/you/Documents/samomdkkuwebOn Windows PowerShell the same check is pwd too, and it prints C:\Users\you\Documents\samomdkkuweb.
If the last part is anything else, you are in the wrong folder. cd samomdkkuweb moves in from just outside it; cd ~/Documents/samomdkkuweb gets you there from anywhere, as long as that is where you cloned it in step 2.
4. Add the database credentials
One command. Do not create or edit any file by hand — that step used to exist and it was where every setup problem came from.
The normal way — from the vault
If you have a SAMO vault account, this is the whole step:
bash
npm run env:pullIt signs you in to the SAMO vault and writes your credentials. Run it again whenever a key changes; it is always current, and nobody has to be at their laptop to help you.
The first run downloads a small command-line tool and tells you it is doing so; later runs skip it. → How to use the SAMO vault if you have not been invited yet, or the sign-in is not behaving.
No command line, or you only need this once
Open samo-dev env in the web vault, copy the whole Notes field, then run npm run setup below and paste it. Same result, nothing downloaded.
Then skip to step 5.
The fallback — from a message someone sent you
No vault account yet, or the vault is not cooperating? A maintainer can send you the two values directly, and this command takes them:
bash
npm run setupIt asks you to paste the lines a maintainer sent you. Paste the whole message, exactly as it arrived — greeting, code fence, quotes and all. It finds the values inside, writes the file for you, and tells you what it set.
  Setting up .env.local
  ─────────────────────

  Paste the lines a maintainer sent you — the whole thing, exactly
  as it arrived. Extra lines, quotes and stray text are fine.

  Then press Enter on an empty line.
Paste, then press Enter on an empty line. You should see:
✓ .env.local written — 2 value(s) set:

      SUPABASE_DEV_URL
      SUPABASE_DEV_ANON_KEY

  No database-work values, which is normal.
You do not have to tidy the message first
It copes with a covering note around the values, a ``` code fence, export in front, quotes around a value, spaces around the =, Windows line endings, and a long key that your chat app wrapped onto two lines. That last one used to be one of the three most common ways this step failed, and now it is not a way at all.
If it says STOP. You were sent something you should not have been sent
You have been given a key to the live site instead of the practice copy. Nothing was written to disk. Tell whoever sent it, today — replacing one takes about two minutes, and saying nothing is the only expensive option.
What it made, if you are curious
A file called .env.local in the project folder — the same folder as package.json.
The leading dot means it is hidden. After running the command you will look in Finder or Explorer, not see it, and think it failed. It is there. To show hidden files: macOS Finder ⌘ + Shift + . · Windows 11 View → Show → Hidden items · Windows 10 the View tab → Hidden items · VS Code shows it already.
.env.local is listed in .gitignore, so git ignores it. Never change that, and never move these values into a file that is tracked — a key committed once stays in the history for ever, and this repository is public.
samo-dev is a copy of real student data, not fake data
Click, submit and delete freely — that is what it is for, and nothing you do there reaches a real student. But never publish its address, never copy records out of it, and never paste its contents into a chat or an issue. The names, รหัสนักศึกษา and photographs in it belong to real people.
4a. Check it worked
bash
npm run env:checkYou should see:
✓ the two values you need to run the site are present and filled in
· no database-work values — normal, and all you need for
  pages, styling, text and behaviour. Ask only if you take on
  a migration.
✓ the development database answered

You are set up. Run `npm run dev` and open the address it prints.
The middle line starting with · is not a warning. It is telling you the two powerful values are absent, which is the state you want.
Anything else names the problem and what to do about it.
Not npm run dev:check — the two names look almost the same
env:check is yours. dev:check is a different command with a different job: it compares the development database against production, so it only works for the two or three people who hold production credentials and deploy the live site. That is not a rank or a title in SAMO — it is simply who has those keys, and a contributor should never be sent them.
Run it anyway and it stops with ✗ PRODUCTION: URL or anon key missing, which reads like your keys are wrong when they are perfectly fine.
4b. Later, when a key changes or a new one appears
You will not have to hunt for it. npm run dev tells you, by name, the moment your file falls behind:
  ⚠️  .env.local is missing 1 value(s) this
      project now needs — you have not been sent them yet:
        SUPABASE_DEV_…            (whatever the new one is called)
      Run: npm run env:pull   (or ask a maintainer, then: npm run setup)
If you have a vault account, npm run env:pull already has it — that is the whole point of it. Otherwise ask for those lines and run npm run setup. It updates just those and leaves everything else alone — you never redo the whole file, and you never have to work out which of your values went stale.
When nothing is wrong it says nothing at all.
4c. Two more values exist. You almost certainly do not want them
SUPABASE_DEV_ACCESS_TOKEN and SUPABASE_DEV_DB_URL are not more of the same thing. The first can delete the practice database entirely; the second is a direct login that ignores every permission rule, so it can read every real name, รหัสนักศึกษา and photograph in one go.
You need them only to change the database's own structure — npm run migrate:*, npm run proofs -- --dev, dev:check or dev:google. If you take on that work, ask then, and run npm run setup again with the new lines; it adds them without disturbing anything.
⛔ Do not ask for them just to have the full set. Two is not an incomplete setup, it is the normal one.
4d. Doing it by hand instead
If npm run setup will not run for any reason:
bash
cp .env.local.example .env.local # macOS / Linuxpowershell
Copy-Item .env.local.example .env.local # Windows PowerShellOpen it, replace the two placeholder values keeping the names exactly as they are, and save. One NAME=value per line, no spaces around the =, no quotation marks — a value in quotes is read as a value that includes the quotes. Then run npm run env:check.
4e. If you do not have the credentials yet
npm run dev still starts and the site still loads. You will get the layout, the styling and the navigation, and empty lists wherever data would be, plus a line in the browser console telling you to run npm run env:check. That is enough for a pure CSS or copy change. It is not enough to test a form, a login, or anything that saves.
npm run dev tells you which database it is using — read that line
Every start prints one line before the address:
  database: samo-dev (xxxxxxxx) — safe to click anything

  ➜  Local:   http://localhost:5174/
If it says NONE configured, your .env.local is not being read — run npm run env:check. The page also wears a coloured ribbon whenever it is not production, so you can tell at a glance from the browser as well.
⚠️ This is new on 2026-09-06 and it fixed a real trap. Before it, filling in .env.local correctly did nothing at all: the guide had you set one pair of names and the site read a different pair, with nothing joining them. The portal came up empty — indistinguishable from having pasted nothing — while /passport/ quietly fell back to the live database. If you followed this guide before that date, npm run dev was not doing what you thought.
5. Run it
bash
npm run devIt prints something like:
  VITE v6.3.5  ready in 412 ms

  ➜  Local:   http://localhost:5174/
Always open the address it printed, not one you remember. Your browser usually opens it for you.
You should get this — the real site, running on your own machine:

Passport is at /passport/, on the same address
npm run dev starts both apps and serves them under one address, the same way the real site does:
http://localhost:5174/— the portalhttp://localhost:5174/passport/— SAMO Passport
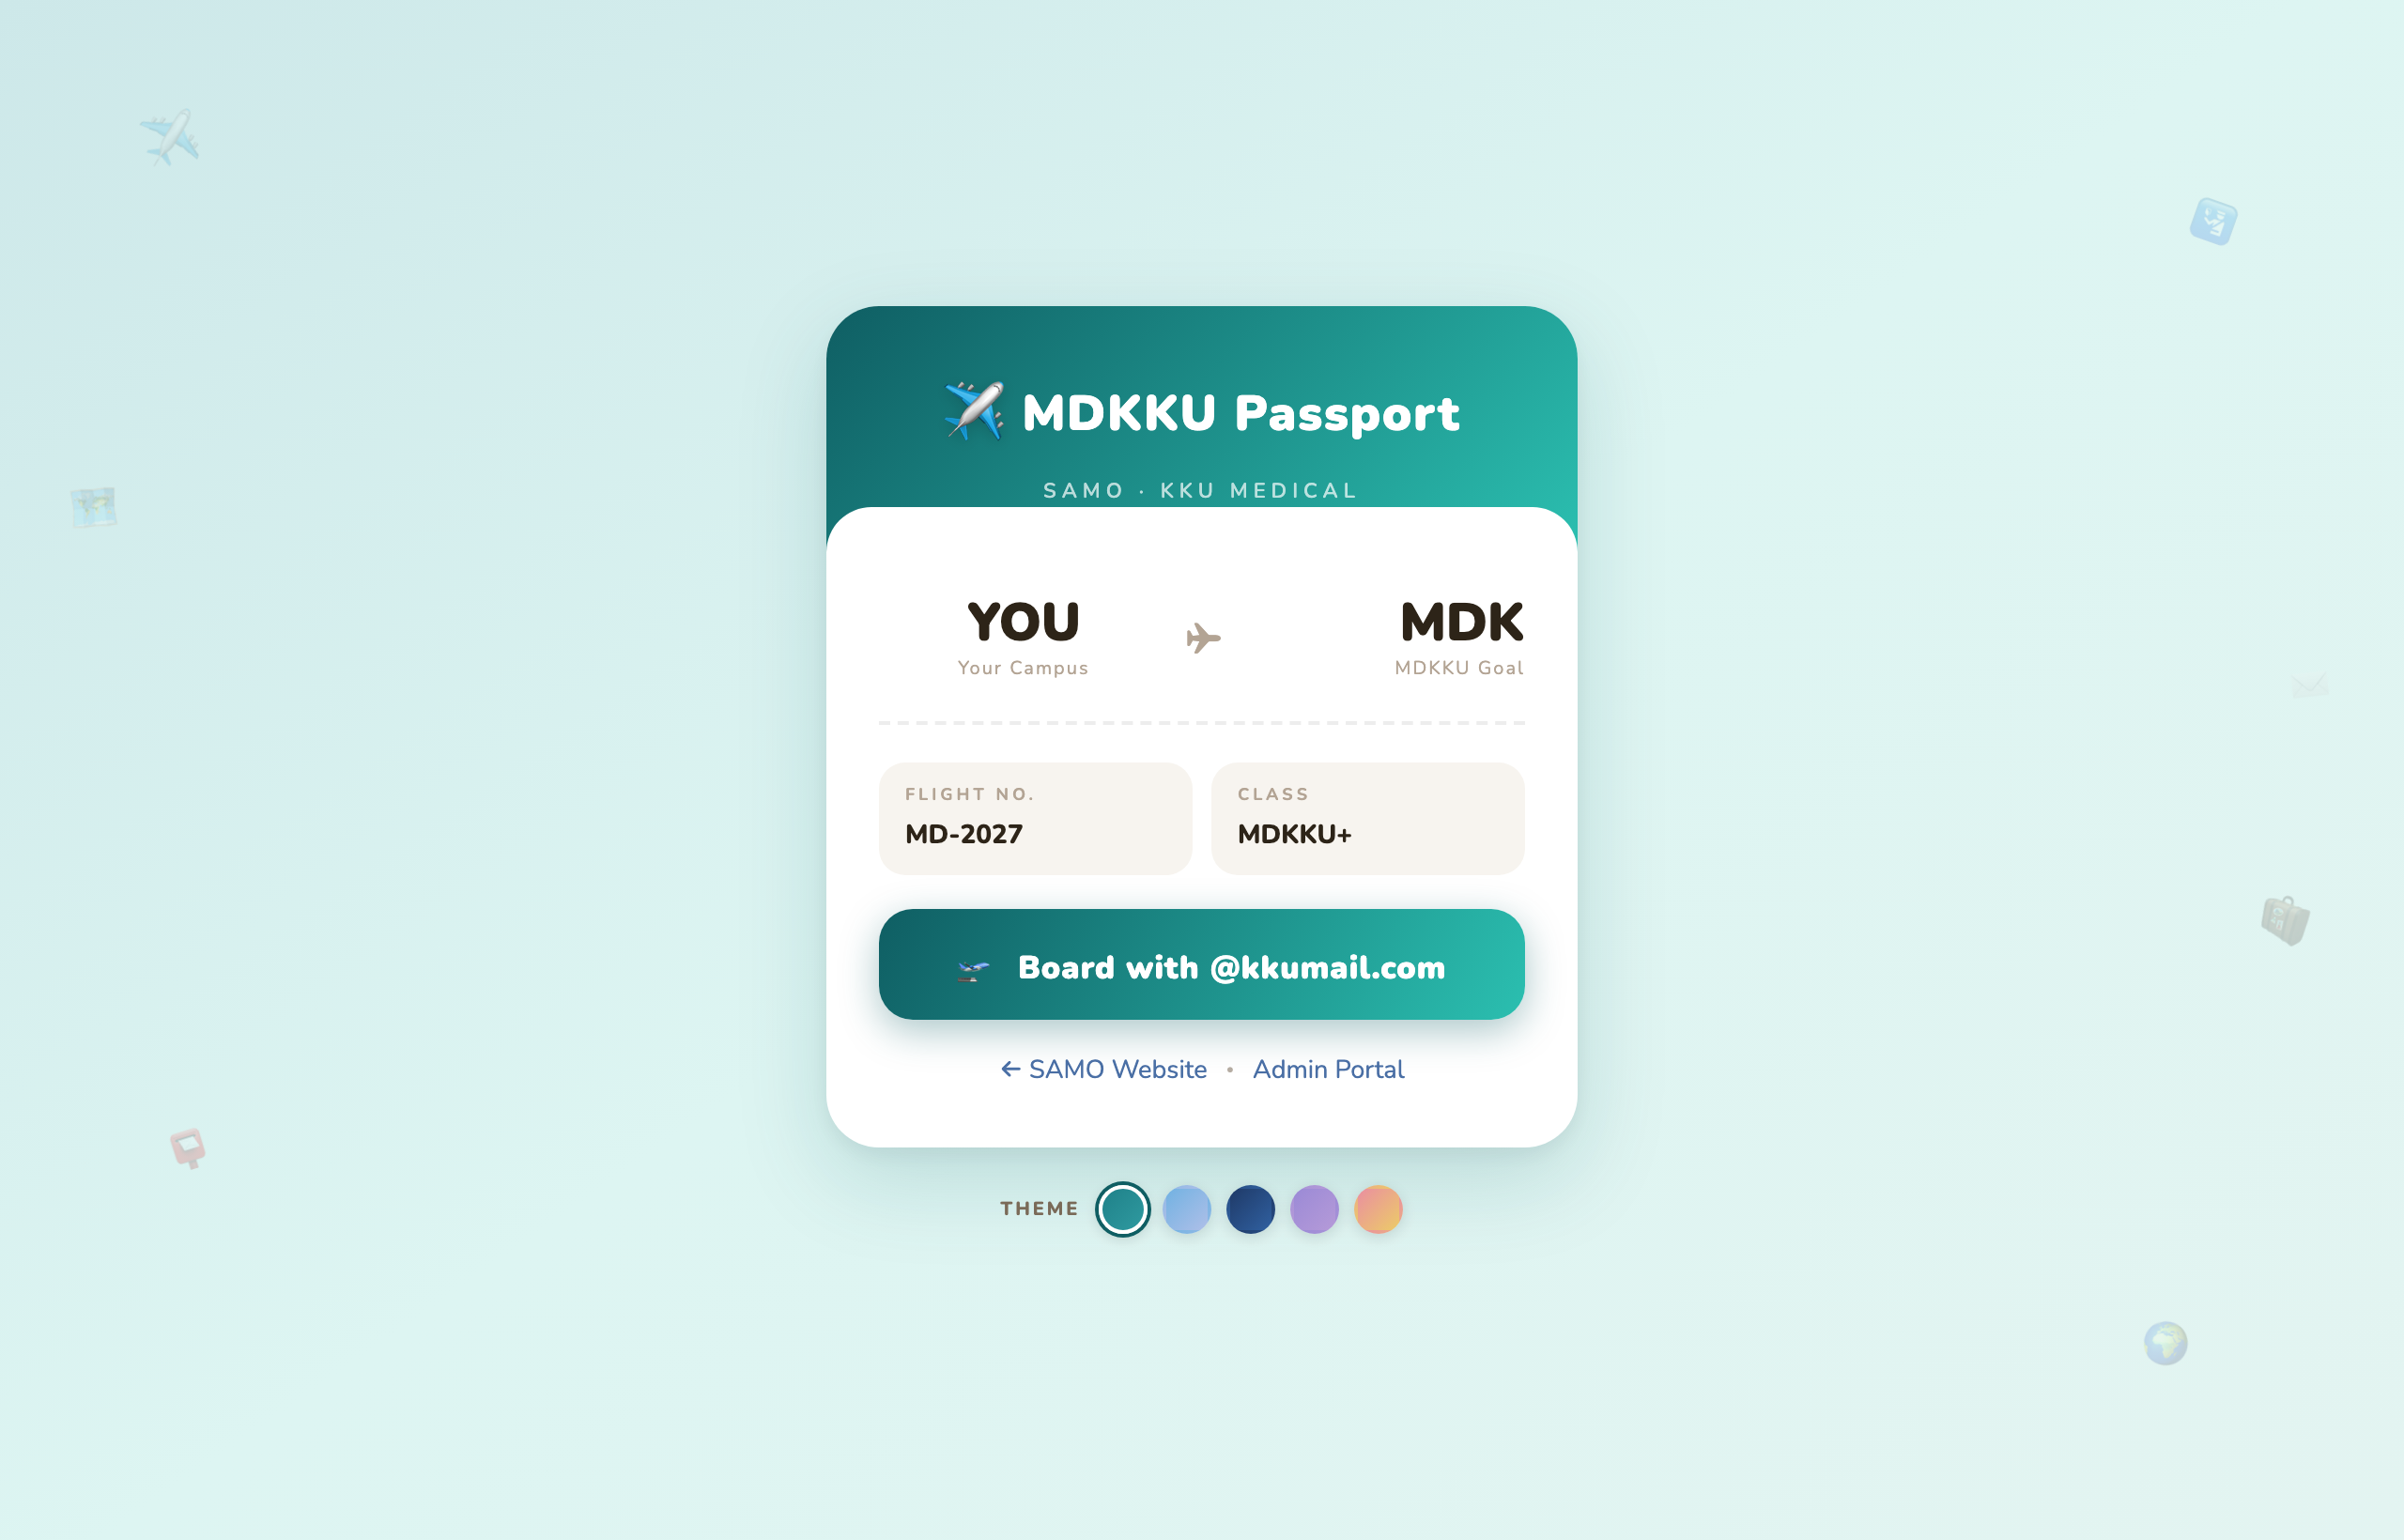
You do not need a second command or a second port. Under the hood it runs two Vite servers and proxies /passport to the second one — passport needs its own build settings — but that is an implementation detail you can ignore.
⚠️ This changed on 2026-09-04. Before that, npm run dev served the portal only and /passport/ answered 200 with the portal's own page — the wrong app wearing the right URL, with nothing to tell you. If you find a guide or a note anywhere saying Passport is unavailable in development, it is out of date.
npm run dev:web still starts the portal alone, and npm run dev:passport starts Passport alone, if you ever want one without the other.
The port is 5174 — until it is not
5174 is the port the project asks for. If something else on your machine is already using it — most often a second copy of this same project, left running in another terminal window — Vite quietly moves to the next free port and tells you:
Port 5174 is in use, trying another one...
➜  Local:   http://localhost:5175/
Everything works exactly the same on 5175. Read the address off the terminal each time and you will never be caught by this.
To use 5174 instead, find the other process and stop it. The usual fix is to press Ctrl + C in whichever terminal window is still running it. If you cannot find it:
bash
lsof -ti:5174 | xargs kill # macOS / Linuxpowershell
netstat -ano | findstr :5174    # Windows — note the PID, then:
taskkill /PID <the-pid> /F
If the SAMO site loads, you are done. Edit any file under src/ and the page updates by itself — no rebuild, no refresh. Press Ctrl + C in the terminal to stop the server.
Two terminal windows is the comfortable setup
Leave npm run dev running in one window and type everything else in a second. Otherwise you are stopping and restarting the server all day.
Commands you will use
| Command | What it does |
|---|---|
npm run env:pull | Fetches your credentials from the SAMO vault, if you have an account there |
npm run setup | Writes .env.local from a pasted credential block. Run it again any time you are sent new values — it updates only what you paste |
npm run dev | Runs the site on your machine, usually at localhost:5174 |
npm test | Runs the test suite. CI runs this exact one on your pull request |
npm run build | Builds the production files — proves nothing is broken before you push |
npm run env:check | Checks your .env.local credentials work |
npm run preview:url | Prints the preview address for the branch you are on |
Where things live
| To change | Edit |
|---|---|
| Pages, tabs, dialogs | src/html/ |
| Colours, spacing, layout | src/css/ |
| Behaviour, buttons, forms | src/js/ |
| Text of the release notes | src/data/changelog.js |
Next — Where the site runs